I Made a Lab to Understand How Networks Really Work
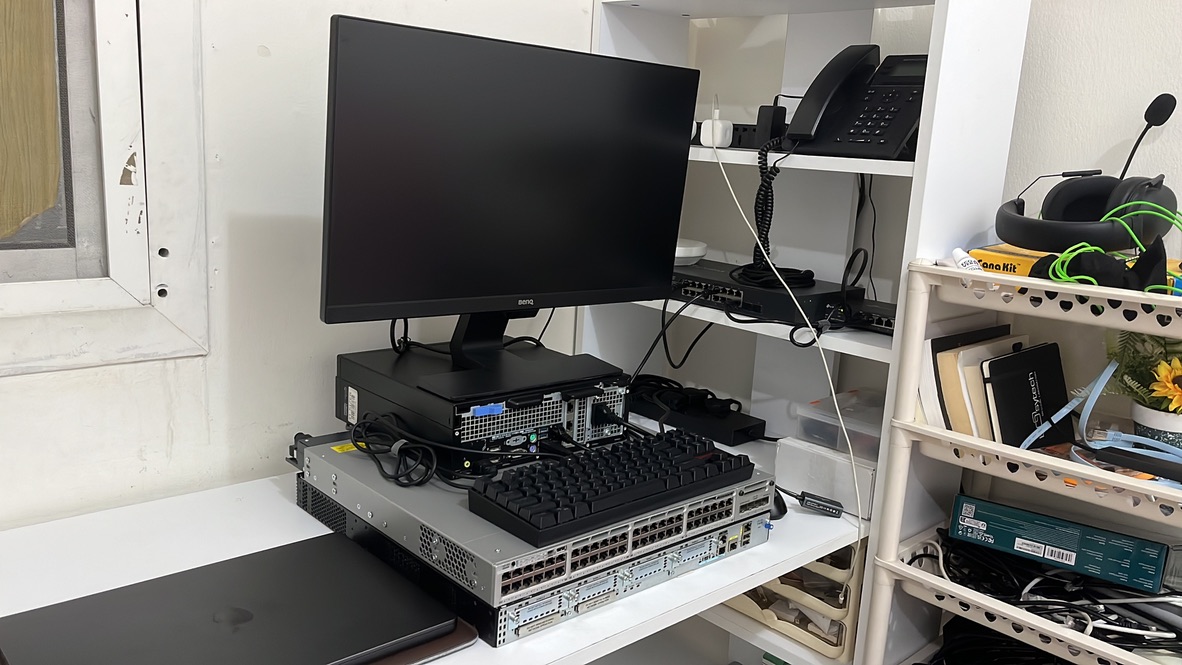
In 2024 I bought an Optiplex 7050. My goal was to host my own website, and tinker with different operating systems and Docker. I ran a lot of services, self hosted a lot of stuff, and used NixOS. It was a great experience. After a while I started exploring networking. Not just DHCP reservations and random IPs, I started learning how to configure IP, VLANs, subnets, and VPNs, and I succeeded at getting them to work. But here is the catch.
I never really knew why it worked the way it did. I never knew that a VLAN is Layer 2, not Layer 3 in the OSI model. I never knew VLANs had nothing to do with IPs, and that those are just shortcuts in consumer/prosumer routers to make it easier. I felt empty.
That’s why yesterday, I decided to start a lab. A lab with gear that gives me full control, with no shortcuts, that would teach me the exact route a packet takes to reach its destination. How routing works. How networks function.
Lab Hardware
My lab consists of:
- 1x Dell Optiplex 7050 - Intel Core i5 7th Gen, 24 GB DDR4 RAM, 2 port NIC
- 1x Cisco 2901 ISR G2 - 512 MB DRAM
- 1x Cisco C3850-NM-4-1G
I got the Cisco 2901 and 3850 both off the used market for 95 USD, and they were both in good condition. Now the 3850 is a Layer 3 switch and it runs IOS XE, while the 2901 runs classic IOS. I know that, but I figured it won’t be a problem for me. The CLI of both operating systems is extremely similar, and I probably won’t use the IOS XE exclusive features. I can always get a newer router anyway.
Both of these devices are EOL already, but who cares, it’s an offline lab. And it’s 99% similar to an up to date IOS XE. When I got them the software was extremely outdated on the 3850, and the 2901 even booted into ROMMON. So I completely wiped them clean and installed new IOS, and IOS XE on the switch through TFTP. And let me just tell you… it was a pain just to get the BIN files, since I can’t just grab them from Cisco’s website.
I find this dumb. For something like the 2901, the license is the hardware, so why do you restrict the software?
Here is a tip. Instead of searching for something like “Cisco 2901 Firmware Download”, go to Cisco’s own page for your device’s firmware, copy the actual bin file name, and search that on Google instead. For example, c2900-universalk9-mz.SPA.157-3.M8.bin. You will find it.
Actually, let me do you a favor, here are some links:

And if those ever stop working, you will find them here: server.mhd64.dev.
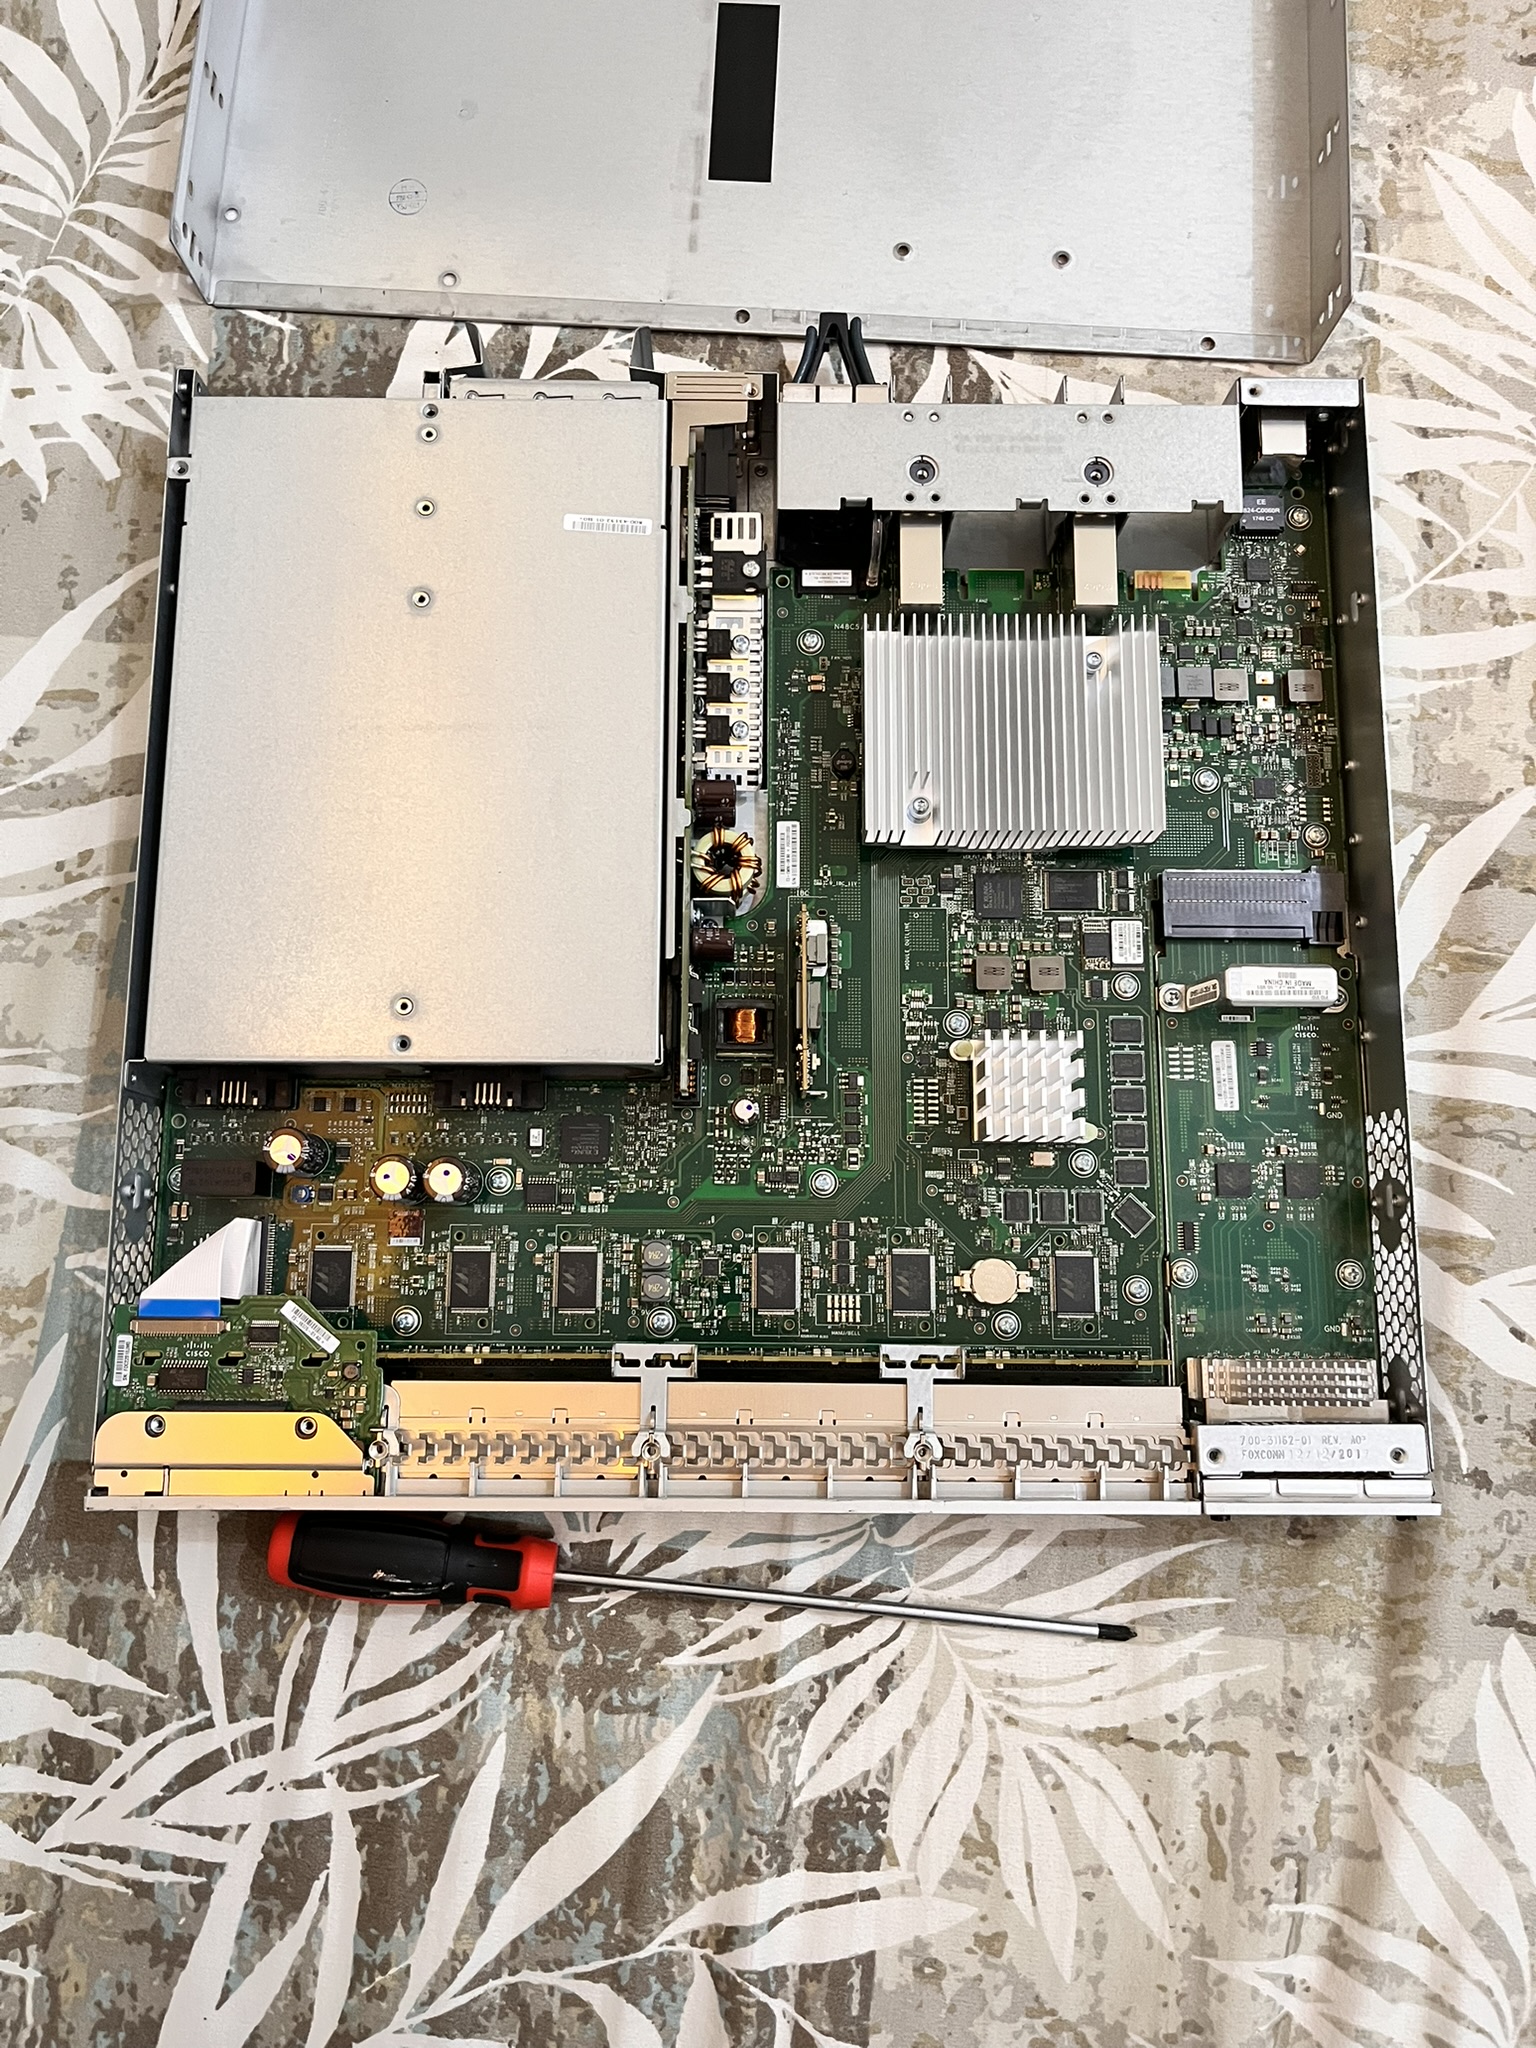
The Noise
And oh man, is that thing loud. This is enterprise gear, it was built to live in a datacenter with its own air conditioning, not on a desk in my room. On boot the fans spin up like a jet taking off. It does calm down after 3 or 4 minutes, once the boot is done and it settles into idle, still hearable, but not annoying. And honestly, server noise is like music to my ears.
The clip below is just the 3850 booting. No 2901 or an Optiplex, no other fans, just the switch. (Ignore Background Noise)
Now in order to learn properly, there have to be clients and servers. I don’t have many physical devices though. What should I do.
Virtualizing Clients
Since I have that Optiplex sitting unused, let’s use it to virtualize my clients and servers. My first try was with VirtualBox. I installed Linux Mint as the host, then installed VirtualBox.
Since I would be assigning each of the 3 VMs its own port, I wanted to know which interfaces I had.
lab@lab:~$ ip -br link show | grep -v lo
enp2s0f0         DOWN           1c:86:0b:31:57:4a <NO-CARRIER,BROADCAST,MULTICAST,UP>
enp0s31f6        UP             d8:9e:f3:39:26:9c <BROADCAST,MULTICAST,UP,LOWER_UP>
enp2s0f1         DOWN           1c:86:0b:31:57:4b <NO-CARRIER,BROADCAST,MULTICAST,UP>
Wait, those interface names are long and a bit unreadable. Let’s assign custom names. I created these 3 files:
/etc/systemd/network/10-board-one.link
/etc/systemd/network/11-nic-one.link
/etc/systemd/network/12-nic-two.link
Each one containing something like this:
[Match]
MACAddress=<interface MAC address here>

[Link]
Name=<desired name here>
Then I rebooted, and it worked.
lab@lab:~$ ip -br link show | grep -v lo
nic-one          DOWN           1c:86:0b:31:57:4a <NO-CARRIER,BROADCAST,MULTICAST,UP>
board-one        UP             d8:9e:f3:39:26:9c <BROADCAST,MULTICAST,UP,LOWER_UP>
nic-two          DOWN           1c:86:0b:31:57:4b <NO-CARRIER,BROADCAST,MULTICAST,UP>
Now back to VirtualBox. I downloaded the Xubuntu ISO and made the 3 VMs. I installed Xubuntu on the first one, then tried installing Guest Additions to get the screen resolution and clipboard sharing working. I spent 2 hours on this until I gave up. I said no problem, I’ll set the resolution manually and just type without copying from the host. Then I tried installing Xubuntu on the second VM while the first was still running. It just… Froze.
Okay, that clearly won’t work, scrap this. I only have 4 cores / 4 threads. I have to consider that.
LXC
I think that’s a good option. LXC is light on RAM and CPU, and it won’t render full GUIs. But there’s a problem. I still want each container to have its own port and manage its own networking. Also, I might need to run GUI tools inside them, like Wireshark, how do I even do that, isn’t it just CLI?
Turns out I can give each container a physical port, and for the GUI, I can use something called X11 forwarding.
Okay, let’s do this.
I reinstalled Linux Mint on the host. The reinstall wiped my renamed interfaces, so I was back to the ugly enp names, but I didn’t bother renaming them again this time.
I also decided to go with LXD instead of raw LXC. It’s the friendlier manager that sits on top and makes all of this a lot less painful.
Getting LXD onto Mint took a couple of steps, since Mint blocks snap by default and LXD ships as a snap:
sudo rm /etc/apt/preferences.d/nosnap.pref
sudo apt install snapd -y
sudo snap install lxd
sudo adduser "$USER" lxd
Then log out and back in so the lxd group actually applies, and run the setup:
sudo lxd init
I took the defaults for most of it, a 30 GiB ZFS pool on a loop device. The one thing I said no to was the default network bridge. I don’t want LXD’s NAT bridge, each container is getting a real physical port instead.
Now the actual trick. One LXD profile per container, and each profile does two things: it hands the container a physical NIC as its eth0, and it wires up X11 so GUI tools can draw on my host’s screen.
config:
  environment.DISPLAY: ":0"
description: "Kali lab endpoint (pc1)"
devices:
  eth0:
    type: nic
    nictype: physical
    parent: enp0s31f6
    name: eth0
  X0:
    type: proxy
    bind: container
    connect: unix:/tmp/.X11-unix/X0
    listen: unix:/tmp/.X11-unix/X0
    security.uid: "1000"
    security.gid: "1000"
nictype: physical is the important part. It pulls the port right out of the host and drops it into the container as eth0. No bridge, no NAT, the container owns the wire. The proxy device shares the host’s X socket into the container, and one command opens the host’s X server to local connections:
xhost +local:
I made one profile each for pc1, pc2 and pc3, every one pointing at a different port (enp0s31f6, enp2s0f0, enp2s0f1).
For the image I went with Kali, specifically images:kali/cloud. The /cloud variant ships cloud-init, so each container’s eth0 pulls an address over DHCP on its own without me configuring anything. Kali also comes loaded with the network tools I’ll want.
The host has to be online for this next part, since it pulls the images over the internet:
lxc launch images:kali/cloud pc1 --profile default --profile pc1
lxc launch images:kali/cloud pc2 --profile default --profile pc2
lxc launch images:kali/cloud pc3 --profile default --profile pc3
And the second those launched, my host lost its internet. Which makes sense, I just handed all three physical ports to the containers, including the one that was my uplink. If I need the host back online, I stop a container to release its port, then bring the connection back up with nmtui:
lxc stop pc1
nmtui   # then activate a connection
One more note for future me, since I kept mixing these up:
lxc launch: create a new container from an image and start it.lxc start: start a container that already exists and is stopped.lxc exec: run a command inside a running one (lxc exec pc1 -- bashdrops you into a shell).
So that’s the client side done. Three Kali boxes, each one holding a real physical port, ready to be plugged straight into the Cisco gear. No bridge pretending to be a switch, no consumer router quietly gluing VLANs and IPs together. Just three machines and three wires.
Now the part I started this whole thing for: putting the 2901 and the 3850 in the middle, and finally watching a packet take the exact route I built for it, and understanding why.
That’s next.